Blood, Frost, or Unholy — Death Knights bring unmatched self-sustain and execute pressure to MoP Classic. Full guide covering all three specs, talents, glyphs, stat priorities, and Tier 16 gearing for Siege of Orgrimmar.

Tank & DPS · WoW MoP Classic (Patch 5.4.8)
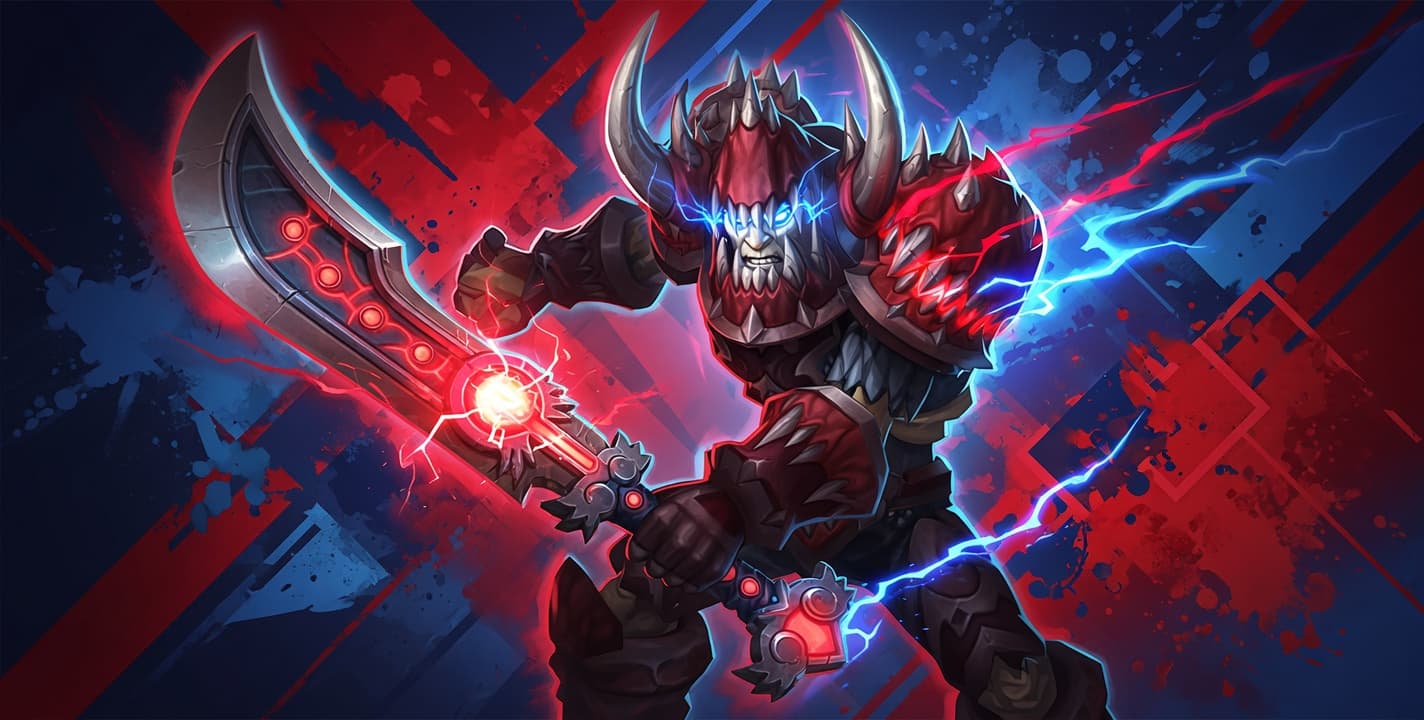
Death Knights are the plate-wearing powerhouses of Mists of Pandaria Classic — a class forged in the Lich King's service that outlasted its master to become one of the most self-sufficient damage dealers and tanks in the game. Whether you are pulling threat as a
Blood tank with an ironclad
Blood Shield, landing icy two-handed slams as
Frost, or unleashing an undead army as
Unholy, the Death Knight is a class that rewards mastery of its rune-and-runic-power resource engine. This guide covers everything you need for Siege of Orgrimmar and beyond.
What Is the Death Knight's Role in MoP Classic?
Death Knights entered Mists of Pandaria with a sharper identity than ever before. The MoP talent overhaul stripped away spec-specific trees and gave all three specializations access to the same six-tier talent system, letting players customize survivability, crowd control, and rune management without sacrificing core spec identity.
The class is defined by its dual-resource system: Runes and Runic Power. Six runes — two Blood, two Frost, two Unholy — power your signature abilities and recharge on individual timers. Abilities generate Runic Power, which funds your hardest-hitting instant casts. Managing both resources simultaneously, and choosing talents that interact with rune regeneration (Blood Tap, Runic Corruption, Runic Empowerment), separates good Death Knights from great ones.
In the Siege of Orgrimmar meta, Blood is a top-tier tank; Frost and Unholy compete for raid DPS slots with different damage profiles. Looking to experience MoP Classic without the grind? Browse MoP Classic accounts ready for Phase 5 progression.
What Are the Strengths and Weaknesses of Death Knights?
Strengths
✓ Exceptional self-sustain — Death Strike heals and generates absorb shields
✓ Death Grip is the only ranged pull in the game, letting you drag casters into melee range and interrupt their cast by moving them
✓ All three specs have reliable execute pressure via Soul Reaper at 35% HP
✓ Blood is among the strongest tanks in MoP for self-healing and threat
✓ Army of the Dead provides a powerful pre-pull or defensive cooldown
✓ Anti-Magic Shell absorbs a significant portion of magical damage on a short cooldown
✓ Unholy brings a persistent pet (Ghoul) and burst gargoyle cooldown
Weaknesses
✗ Rune system has a learning curve — mistakes leave you GCD-locked with no resources
✗ Frost and Unholy DPS require tight cooldown stacking to reach peak output
✗ Limited raid utility compared to classes like Paladin or Shaman
✗ Blood DPS contribution sacrificed for unmatched survivability
✗ Unholy gargoyle gains nothing from moving targets; fights with movement hurt
✗ Reforging demands careful attention — wrong secondary stats are a significant DPS loss
Blood Death Knight — How Does the Tank Spec Work?
Blood is the definitive Death Knight tank spec in MoP Classic. The core fantasy is simple: you hit things, you heal back what you lose, and you generate absorb shields from the heals. In practice, Blood is a reactive priority system built around keeping Death Strike on cooldown to power Mastery: Blood Shield, your stacking absorb mechanic. Higher Mastery means each Death Strike heal converts into a larger shield. This self-sustain loop lets Blood DKs survive mechanics that would require heavy external healing on other tanks.
What Are Blood's Key Abilities?
Your most important button. Deals weapon damage and heals you for 20% of damage taken in the last 5 seconds, converting into a Blood Shield absorb. Never sit on two available Death Runes when taking damage.
Applies a debuff that explodes for large Shadow damage if the target is still below 35% health after 5 seconds. Replaces Heart Strike as your Blood Rune spender during the execute phase.

DAMAGE REDUCTION · NO COST
Generates 6 charges that each reduce physical damage taken by 20%. In MoP Classic, Bone Shield has no Rune cost. Apply before the pull and refresh on cooldown throughout the fight.
Temporarily increases your maximum health by 15% and boosts healing received by 25% for 10 seconds on a 1-minute cooldown. Use it liberally — it comes back often enough to be used on every dangerous phase.
Reduces all damage taken by 50% for 12 seconds on a 3-minute cooldown. Save it for predictable spike damage, tankbuster mechanics in Siege of Orgrimmar, or emergency situations when healer cooldowns are down.
Summons a spectral rune weapon that mirrors your attacks for 12 seconds, granting 20% parry chance. A strong threat tool on the pull and a passive mitigation cooldown. The Tier 16 4-piece bonus supercharges it by converting all runes to Death Runes on activation.
What Is the Blood DK Rotation?
| Priority | Ability | Condition & Reason |
|---|
| 1 | Bone Shield | Pre-pull and maintain on cooldown throughout the fight. Every lost stack is lost physical damage reduction. |
| 2 | Outbreak | Apply both diseases on pull. On cooldown thereafter. Refresh with Blood Boil if Outbreak is down. |
| 3 | Death Strike | Spend Death Runes here first. Your main self-heal and Blood Shield generator. Never delay when taking active damage. |
| 4 | Rune Strike | Spend Runic Power when approaching the cap. Generates threat and procs rune regeneration talents. |
| 5 | Soul Reaper / Heart Strike | Soul Reaper replaces Heart Strike when target drops below 35%. Heart Strike is the standard Blood Rune spender above that threshold. |
| 6 | Death and Decay (3+) | On cooldown whenever three or more enemies are present. On single targets, only use it via Crimson Scourge free procs. |
| 7 | Horn of Winter | Pure filler when all other priorities are met. Generates Runic Power and applies the Strength/Agility raid buff. |
Blood DK Stat Priority
1. Stamina — Raw health pool. More health means Death Strike heals more and Blood Shield absorbs more.
2. Mastery — Directly amplifies your Blood Shield size. The premier Blood DK secondary stat.
3. Hit (7.5% cap) — Ensures Outbreak and other abilities always land. Missing on a disease application is costly.
4. Expertise (7.5% cap) — Prevents boss dodges on your physical attacks including Death Strike.
5. Haste — Speeds rune recharge, giving you more Death Strikes per minute.
6. Parry / Dodge — Avoidance with diminishing returns; balance both rather than stacking one.
Frost Death Knight — What Makes It Unique?
Frost is the melee DPS spec defined by explosive burst from proc chains and cooldown alignment. The spec runs on two diseases — Frost Fever (applied by Howling Blast) and Blood Plague — and your damage scales dramatically when Killing Machine and Rime procs line up with Pillar of Frost.
In MoP Classic, Frost runs almost exclusively as a dual-wield Masterfrost build, stacking Mastery to amplify Obliterate and Frost Strike damage. The two-handed variant is viable but generally trails dual-wield in optimized gear.
What Are Frost's Core Abilities?
Hits the target and all enemies within 10 yards for Frost damage while applying Frost Fever. Free-to-cast when Rime procs. Your primary AoE tool and disease spreader on trash packs.

MAIN NUKE / UNHOLY SPENDER
Deals high physical damage and scales with the number of diseases on the target. Spend Unholy Runes on Obliterate, prioritizing it when Killing Machine is active for guaranteed critical strikes.
Your primary Runic Power dump. Deals high Frost damage and scales with Mastery in the Masterfrost build. Spend it at 89+ Runic Power to avoid capping, or immediately when Killing Machine procs.
Grants 20% Strength for 20 seconds and makes you immune to several crowd control effects. Use on cooldown and align with trinket procs, racial abilities, and Army of the Dead gargoyles whenever possible.
Summons a wave of ghouls that fight for you. Cast 4-5 seconds before the pull to avoid the channeled delay inside combat. Ghouls also grant a passive Parry chance bonus to nearby allies while active.
Refreshes all six runes and generates 25 Runic Power instantly. Save it for the end of a Pillar of Frost window when your runes are depleted, or use defensively to spam Death Strike in an emergency.
What Is the Frost DK Single-Target Rotation?
| Priority | Ability | When |
|---|
| 1 | Soul Reaper | Immediately when target drops below 35% health. Your execute and highest priority at that threshold. |
| 2 | Frost Strike (KM proc) | Consume a Killing Machine proc with Frost Strike when Unholy runes are unavailable for Obliterate. |
| 3 | Obliterate (KM proc) | Best use of Killing Machine — guaranteed crit on Obliterate hits harder than on Frost Strike. Requires diseases active. |
| 4 | Howling Blast (Rime) | Free Howling Blast from Rime proc. Never delay — Rime does not stack, so a new proc overwrites an unused one. |
| 5 | Frost Strike (89+ RP) | Spend Runic Power before you cap at 100. Capping wastes resources the same as letting runes sit idle. |
| 6 | Obliterate (filler) | Your standard Unholy and Death Rune spender when no higher-priority proc is active. |
| 7 | Horn of Winter | Filler when all runes are recharging. Generates Runic Power and keeps the raid buff active. |
AoE note: On three or more enemies, prioritize free Howling Blast casts from Rime procs to spread Frost Fever to all targets, then use Death and Decay on cooldown. Howling Blast becomes your dominant spender rather than Obliterate when mob counts justify it.
Frost DK Stat Priority
1. Strength — Your primary damage stat. Every other stat serves Strength.
2. Hit (7.5% cap) — Hard cap. Misses lose you Runic Power generation and disease uptime.
3. Expertise (7.5% cap) — Hard cap. Boss dodges delete your rune spending for that GCD.
4. Mastery (dual-wield) — The Masterfrost build stacks Mastery as its first secondary after caps. Amplifies Frost Strike and Obliterate through the Frozen Heart passive.
5. Critical Strike — Feeds Killing Machine and Rime proc rates. Valued after Mastery on dual-wield.
6. Haste — Lowest priority secondary. Speeds rune recharge but contributes less than Mastery or Crit.
Unholy Death Knight — How Does the Undead Army Work?
Unholy is the dot-and-pet master of the Death Knight class. You maintain two diseases on every target, build stacks of Shadow Infusion by dumping Runic Power into Death Coil, and spend those stacks to activate Dark Transformation, turning your Ghoul into a fearsome abomination that deals dramatically increased damage. Burst windows are defined by stacking Summon Gargoyle with every available Strength proc for a massive three-minute burst spike.
What Are Unholy's Signature Abilities?
Deals physical damage plus bonus Shadow damage for each disease present on the target. Spend Unholy and Death Runes on Scourge Strike. Damage scales significantly with both diseases active.
Deals weapon damage and extends Blood Plague, Frost Fever, and Chains of Ice by up to 6 seconds. Spend Blood and Frost Runes here. Keeps diseases rolling without needing another Outbreak cast.
Summons an Ebon Gargoyle for 30 seconds that scales with your Strength. Stack every Strength trinket, racial, and potion when you press this. The single biggest burst window in the Unholy kit.
Consumes 5 Shadow Infusion stacks to transform your Ghoul into a powerful abomination, doubling its damage output for 30 seconds. Activate the moment you reach 5 stacks — never sit on a full stack.

RUNIC POWER DUMP / STACK BUILDER
Deals Shadow damage and generates one stack of Shadow Infusion on your Ghoul. Spend Runic Power on Death Coil to build toward Dark Transformation. Also usable when all runes are on cooldown as a gap filler.
Same execute tool as Blood and Frost — applies a 5-second delayed Shadow nuke that fires if the target is still below 35%. Replaces Scourge Strike as your Unholy/Death Rune spender during the final phase of boss fights.
What Is the Unholy DK Rotation?
| Priority | Ability | When & Why |
|---|
| 1 | Dark Transformation (5 stacks) | Activate immediately at 5 Shadow Infusion stacks. Delayed Dark Transformation uptime is pure DPS loss. |
| 2 | Soul Reaper | When target falls below 35% health. Highest priority at that point — do not delay for other procs. |
| 3 | Outbreak | Apply on pull, reapply if diseases drop. Never let both diseases fall off simultaneously — Scourge Strike damage collapses. |
| 4 | Scourge Strike | Spend Unholy and Death Runes. Primary damage ability when diseases are active. |
| 5 | Festering Strike | Spend Blood and Frost Runes. Extends disease duration so Outbreak stays off cooldown more consistently. |
| 6 | Death Coil | Spend Runic Power, build Shadow Infusion stacks. Cast when no runes are available or when approaching the Runic Power cap. |
| 7 | Summon Gargoyle | On cooldown, but time it with trinket procs and Strength buffs for maximum value. Use Unholy Frenzy to amplify the burst window. |
Unholy DK Stat Priority
1. Strength — Primary damage stat. Also feeds Gargoyle scaling, which compounds your burst window value.
2. Hit (7.5% cap) — Hard cap. A missed Outbreak on pull sets your diseases back 1 minute.
3. Expertise (7.5% cap) — Hard cap. Boss dodges on Scourge Strike waste Unholy Runes.
4. Critical Strike — Feeds proc rates and amplifies Scourge Strike burst. Primary secondary after caps.
5. Haste — Speeds rune regeneration, giving you more Scourge Strikes and Death Coils per fight.
6. Mastery — Lowest priority for Unholy. Mastery amplifies Shadow damage but trails Crit and Haste for Unholy's kit.
How Do MoP Talents Work for Death Knights?
MoP Classic uses a redesigned talent system: six tiers unlocked at levels 15, 30, 45, 60, 75, and 90, with three choices per tier shared across all Death Knight specializations. You pick one talent per tier, and you can swap them out of combat using Tomes of the Clear Mind. There are no more spec-exclusive talent trees — the customization happens in these six choices.
| Tier (Level) | Choices | Best Pick by Spec |
|---|
| Tier 1 — Level 15 | Roiling Blood / Plague Leech / Unholy Blight | Blood: Roiling Blood (spreads diseases via Blood Boil, strong for multi-target). Frost/Unholy: Plague Leech (converts diseases into two active Death Runes on demand, top pick for DPS specs). |
| Tier 2 — Level 30 | Purgatory / Anti-Magic Zone / Lichborne | Blood: Purgatory (the last-stand passive that absorbs a killing blow once per 3 min, a near-universal tank pick). DPS specs: Anti-Magic Zone (group-wide magic reduction wall, valuable in progression fights with heavy magic damage). |
| Tier 3 — Level 45 | Chilblains / Asphyxiate / Death's Advance | All specs: Death's Advance. Passive 10% movement speed plus an on-demand sprint. Asphyxiate is a ranged stun useful in PvP and certain dungeon packs. |
| Tier 4 — Level 60 | Death Pact / Death Siphon / Conversion | All specs: Death Pact. Sacrifices your Ghoul to heal you for 50% of your maximum health. The strongest burst self-heal available. Conversion is useful in sustained damage environments. |
| Tier 5 — Level 75 | Blood Tap / Runic Corruption / Runic Empowerment | Blood: Blood Tap (top recommendation for tank play — spending resources charges a pool that lets you activate any depleted rune on demand, giving you maximum control over Death Strike timing). Frost/Unholy: Blood Tap is also dominant for DPS specs for the same reason; Runic Corruption (random rune regenerates 100% faster on Runic Power spend) is a valid alternative if you prefer a more passive proc-based style. |
| Tier 6 — Level 90 | Gorefiend's Grasp / Remorseless Winter / Desecrated Ground | All specs: Gorefiend's Grasp — yanks all enemies in a 20-yard radius into one spot. The most powerful AoE grouping tool in the game. Desecrated Ground counters crowd control and is best suited to PvP. |
Talent-swapping tip: Keep a stack of Tomes of the Clear Mind in your bags. Gorefiend's Grasp is mandatory in Siege of Orgrimmar for grouping adds on many fights, but you may want Remorseless Winter on certain boss encounters. Swap freely between pulls with no cost.
Which Glyphs Should Death Knights Use?
Major Glyphs
Glyph of Festering Blood
BLOOD / ALL SPECS (TRASH)
Makes Blood Boil behave as if all targets have both diseases active, regardless of whether they do. Massive AoE value on trash packs in Siege of Orgrimmar and dungeon content. Near-universal pick for Blood tanks on any multi-enemy encounter.
Glyph of Anti-Magic Shell
ALL SPECS
Increases the damage absorbed by Anti-Magic Shell from 75% to 100% of magic damage. More absorption means more Runic Power generated — AMS becomes a small DPS cooldown alongside a defensive one.
Glyph of Pestilence
ALL SPECS
Increases the radius of Pestilence by 5 yards. Highly practical for spreading diseases to tightly packed but not stacked groups, particularly during Siege of Orgrimmar's multi-add encounters.
Glyph of Dark Succor
FROST / UNHOLY
Causes Death Strike to heal for at least 20% of your maximum health when you are in Frost or Unholy Presence. A strong emergency survival tool that turns a normally DPS-focused button into a meaningful self-heal.
Glyph of Outbreak
BLOOD ALTERNATIVE
Removes the 1-minute cooldown on Outbreak but adds a 30 Runic Power cost. Best on Blood tanks who prefer a cheaper but always-available disease application tool over Roiling Blood.
Glyph of Regenerative Magic
UNHOLY
Anti-Magic Shell generates additional Runic Power based on damage absorbed. On magic-heavy encounters in Siege of Orgrimmar, this feeds more Death Coil casts and accelerates Shadow Infusion stacking.
How Do You Gear a Death Knight for Siege of Orgrimmar?
Tier 16: Battleplate of Cyclopean Dread
The Death Knight Tier 16 set — Battleplate of Cyclopean Dread — drops from Siege of Orgrimmar in four item-level tiers: LFR, Flexible, Normal, and Heroic. Tier tokens come from specific Siege bosses, so targeting those bosses early in a lockout is the fastest route to completing the set.
Tier 16 Set Bonuses
Blood (Tank)
2-piece: Every 10 damaging ability casts (Heart Strike, Rune Strike, Death Coil, Soul Reaper, Blood Boil) adds one charge to your next Bone Shield activation. Sustained use of the priority list constantly feeds your shield.
4-piece: Dancing Rune Weapon reactivates all Frost and Unholy Runes as Death Runes on use. Every Rune Weapon window becomes a flood of Death Strike and Heart Strike casts.
Frost & Unholy (DPS — shared tokens)
2-piece: Killing Machine and Sudden Doom grant a stacking buff of 500 Haste or Mastery (whichever is higher on your character) that stacks up to 10 times. Consistent proc generation can push this to 5,000 secondary stat rating — a massive throughput boost.
4-piece (Unholy priority): Each Death Coil cast extends Dark Transformation by 2 seconds. Generous Runic Power spending turns your Transformed Ghoul into a near-permanent abomination during burn windows.
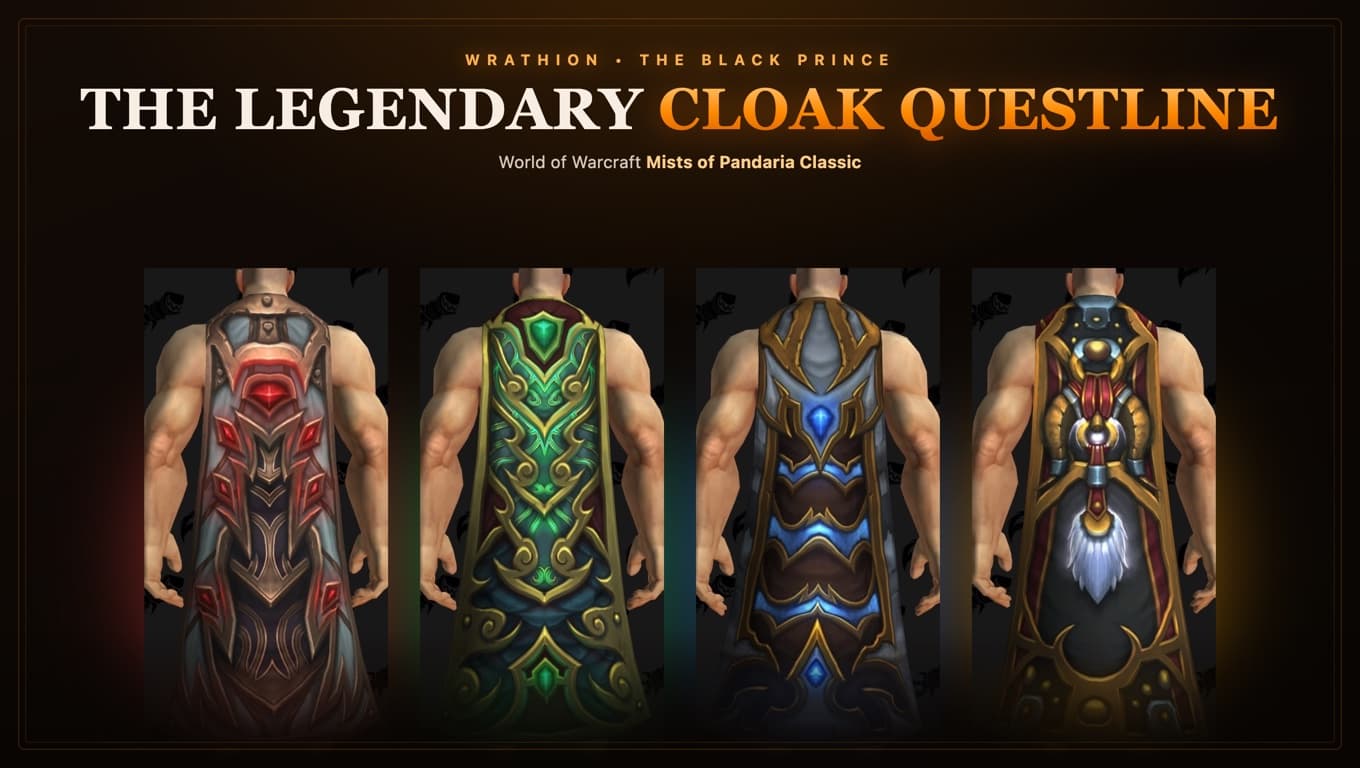
The Legendary Cloak: Completing Wrathion's Questline
Patch 5.4.8 marks the final chapter of Wrathion's legendary questline. Completing it rewards Qian-Ying, Fortitude of Niuzao (tank cloak) or Fen-Yu, Fury of Xuen (DPS cloak), depending on your loot specialization. The cloaks include a powerful on-use effect — for tanks it triggers a massive absorb shield, for DPS it procs a flat damage increase — and are best-in-slot for all Death Knight specs throughout Siege of Orgrimmar progression.
Gearing priority at Phase 5: Complete the legendary cloak questline first if you have not already. Run Siege of Orgrimmar on the highest difficulty your group can clear. Valor Points (capped weekly) can fill in non-tier slots — prioritize slots your tier pieces do not occupy. Reforge every secondary stat to match your spec's priority list above using a reforging tool after each gear upgrade.
Is Death Knight Good for PvE Raiding and PvP in MoP Classic?
PvE — Raid & Dungeon
Blood tanks are among the strongest in the game at Phase 5 — their self-sustain reduces healer pressure on progression fights and their Death Grip is invaluable for repositioning casters. Frost is a reliable mid-tier DPS spec with high cleave upside on multi-target encounters inside Siege of Orgrimmar. Unholy leans heavily single-target but the 3-minute Gargoyle burst window is among the highest spike damage in the game, making Unholy excellent for fights where priority-target DPS matters.
PvP — Arena & Battleground
Unholy Death Knight is a feared PvP spec in MoP Classic arena. Sustained pressure from diseases and the Ghoul, paired with strong CC via Chains of Ice and Asphyxiate, makes Unholy DK a top tier 2v2 and 3v3 pick. Death Grip at range creates unique offensive opportunities. Desecrated Ground (Level 90 talent) makes you immune to most CC for 8 seconds, a critical defensive in burst-heavy arena compositions. Blood DK is playable but rarely chosen in serious PvP — it sustains too well but lacks offensive punch.
FAQ
What is the best Death Knight spec for leveling to 90 in MoP Classic?
Blood is the most comfortable leveling spec due to its self-healing loop — you rarely need to stop between pulls. Unholy is a close second with the persistent Ghoul as a free meatshield. Frost works fine but lacks the raw sustain of Blood in the open world. Once you reach 90, respec to your preferred endgame spec.
What hit and expertise caps do I need as a Death Knight?
Both Hit and Expertise need to reach 7.5% before secondary stats matter. In MoP, Hit also covers spell hit, so a capped Hit stat ensures your diseases from Outbreak always land. Expertise prevents boss dodges on your physical attacks. Cap both before investing in Mastery, Crit, or Haste.
How do I gear for Siege of Orgrimmar as a Death Knight?
Prioritize completing the legendary cloak questline, then target Tier 16 token bosses in Siege of Orgrimmar on the highest difficulty your group can clear (Flexible, Normal, or Heroic). Use Valor Points for non-tier slots. After each gear upgrade, reforge secondary stats to match your spec's priority: Mastery for Blood and Frost dual-wield, Critical Strike for Unholy.
How does Blood Shield work and why does it matter?
When you use Death Strike, it heals you for 20% of the damage you took in the last 5 seconds. A portion of that heal — amplified by your Mastery rating — converts into a physical absorb shield called Blood Shield. Stacking Mastery dramatically increases the size of every shield, which is why Blood tanks prioritize Mastery as their primary secondary stat.
Should Frost Death Knights play dual-wield or two-handed in MoP Classic?
Dual-wield (Masterfrost) is the dominant Frost build in MoP Classic endgame content. It stacks Mastery to amplify Frost Strike damage and generates more Killing Machine procs through faster attack speed. Two-handed Frost is viable and simpler to play but generally trails dual-wield on optimized gear. If you are starting out, two-handed is forgiving; if you are pushing progression rankings, dual-wield is the pick.
What is the strongest cooldown alignment for Unholy DK burst?
Stack Summon Gargoyle with every Strength trinket proc you can trigger, a DPS potion, and your racial ability if it provides a Strength or damage increase. All of these scale the Gargoyle directly because its damage is calculated from your Strength at the moment of summoning. Unholy Frenzy is a separate 3-minute cooldown that grants 20% haste to a friendly target at the cost of a health drain — coordinate it with a co-DPS or tank who can absorb the health cost, and time it to land during your Gargoyle window for maximum raid output.
- Siege of Orgrimmar Raid Guide — full boss breakdown and loot for Phase 5
- MoP Classic Phase 5 Guide — everything new in Phase 5 including Tier 16 and the legendary cloak finale
- Warrior Guide — MoP Classic — the other plate melee DPS and tank class
- Paladin Guide — MoP Classic — holy, protection, and retribution for the plate healer/tank/DPS
- Monk Guide — MoP Classic — MoP's new class with Brewmaster tanking and Windwalker DPS
- Warlock Guide — MoP Classic — strong ranged DPS alternative for Siege of Orgrimmar progression